We've been enjoying our new place here in Hudson a lot, and dreaming about all the ways we'd like to transform it. We're pretty slow at the improvement process: we spend ages deciding what to do, seeing how we use the space differently during each season, sourcing materials and hoarding liquidation treasures - and then we throw ourselves into massive disruption and detail-oriented reno insanity for months. It's how we roll.We're about to embark on a few less intensive projects around here - while we're going to need to save for a while before tackling the bathroom or the kitchen, my office and the dining room are relatively straightforward (no plumbing, drywall or re-wiring!) and begging for makeovers. So I thought I'd start with a send-off of our old place today - we've been lucky enough to be featured before in a few of our favourite places, but I've received some requests for sourcing and additional details so I'm happy to share. Having to leave a place under duress can make you want to forget all about it but we are still so proud of all our hard work, and we really, really loved that apartment. So here goes.
Our first project
When we first moved into our beat up, worse-for-wear, home-handyman-special apartment, money was tight (hello, new mortgage) - and like I said, we're slowpokes. We didn't even paint. For years. I don't recommend this. In the meantime, we entertained ourselves with fun projects such as this one: colour coordinated floating bookshelves.
The kitchen
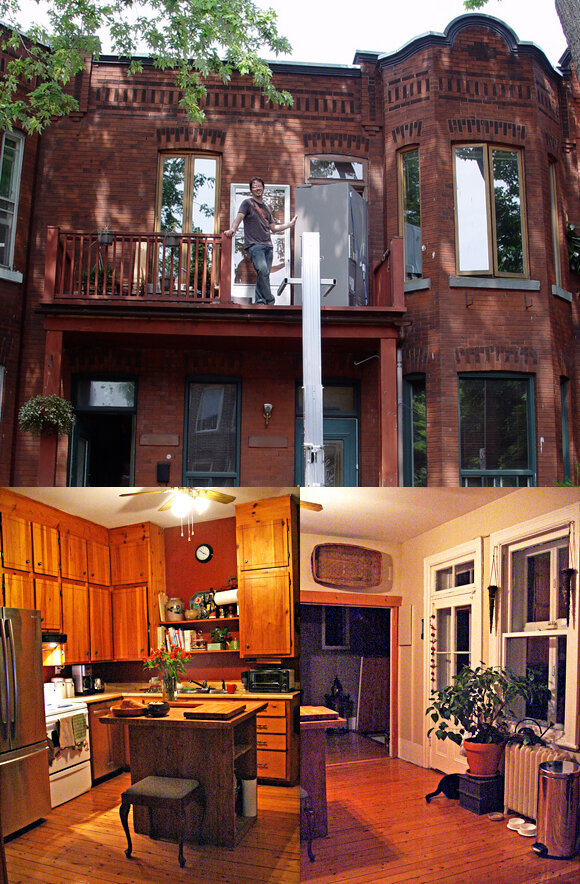
It took two years before we were ready to tackle our first major reno - the kitchen/dining room. I can't really describe how dark, dysfunctional and frustrating that space was, but I'll give it a go. Handyman pine "cabinets" with no divisions, backs or any other kind of delineations, huge amounts of wasted space and weird patch jobs; faux bois melamine countertops that were warped and slowly rotting; a thickly-grouted, pink-tiled island that wobbled every time you used it; a stove with a hood vent that led absolutely nowhere; a fridge in the middle of the room (no really - there was no space allocated for the fridge. So it was blocking a set of cabinets by sitting in the MIDDLE OF THE ROOM). For some reason the floor in the kitchen was different from the rest of the apartment - wide, knotty pine full of cracks and holes a toddler could get lost in. The dining room was a narrow, useless space (behind double doors, I don't know why) and the previous tenant had left a 250-pound granite-and-aluminum "artwork" behind for us to dispose of. The dining room, also, had a third kind of wood floor.
When we first moved in, we made a few minor adjustments to improve the space: Christian cut out the cabinets that the fridge was blocking (we couldn't use them anyways) so that we could slide a new fridge up against the wall. It meant that the fridge was right up against the stove but it did allow a lot more space to move around. Did I mention that the fridge couldn't come up our apartment stairs? After three attempts from the delivery company, Christian took charge and brought it in through the balcony. He's unstoppable.
Our dream for the space was to tear down the wall between the kitchen and the dining room, replace the kitchen and dining room floors to match the rest of the apartment, widen the window in the dining room (this was the only thing we didn't do, due to budget), bring up gas for a new stove, and basically re-wire, re-light, re-plumb EVERYTHING else in the space. We spent weeks designing the cabinetry look and layout ourselves and then hired a cabinetmaker to build them. Replacing the floors turned out to be a very tricky (but ultimately successful) task as, sadly, almost nobody produces the classic Montreal apartment width of flooring anymore. As we tore down the walls, we discovered a panoply of sins that kept us occupied for weeks longer than expected (always expect this). We ripped out (very) illegal wiring, moved and re-wired the entire breaker box, re-routed a drain we found in the wall that led nowhere (i.e. was allowing rain to drip straight through the house), ripped out a mess of illegal plumbing, insulated an exterior wall, and basically just made the apartment a much safer, drier and cozier place to be.
We spent three months on this project - we basically took half of our apartment, shoved it unceremoniously into the other half of our apartment, sprinkled it all liberally with dust and dirt, covered every spare inch of floor with tools, piles of flooring, plumbing and drywall, had strangers clomping around every day, and lived like crazy people. The only water source came from our tiny bathroom sink and the bathtub - for the first seven weeks we did dishes in the bathtub. We ate whatever we could make on the bbq or in the toaster. (The fridge was, rather conveniently, right next to the couch and made for very pleasant television watching.) It was total madness, and definitely not for the faint at heart. But - to wake up every morning and walk into this? Sunlight. Open space. Functional cabinetry. A DINING ROOM. Worth. Every. Moment.
The bathroom
This room already has a lot of details explained here so I'll just post a few before and after shots. We hadn't planned on renovating the bathroom for another few years but a pretty serious hidden defect reared its ugly head and we had to take action sooner. It was a very nightmarish situation and I ended up not being able to live at home while we worked on getting things done. Luckily we had been thinking about it for ages so we knew what we wanted.
Once again, a multitude of sins. Illegal plumbing and wiring, zero ventilation, poor lighting - we redid it all, and knocked down a wall that allowed us to put a shower in the skylight well ( previously just a window above the sink). When we ripped out the walls and the floor, we discovered the brick and decided to keep it exposed - I love the added texture. We also added a toilet (previously in the little closet next door). The tub, too big for our staircase, came in through the balcony. Big, bright, clean, inviting... sigh. I miss this room.
A lot less impressive, but a few more rooms that we fixed up along the way (before-we-moved-in photos followed by afters):
The living room
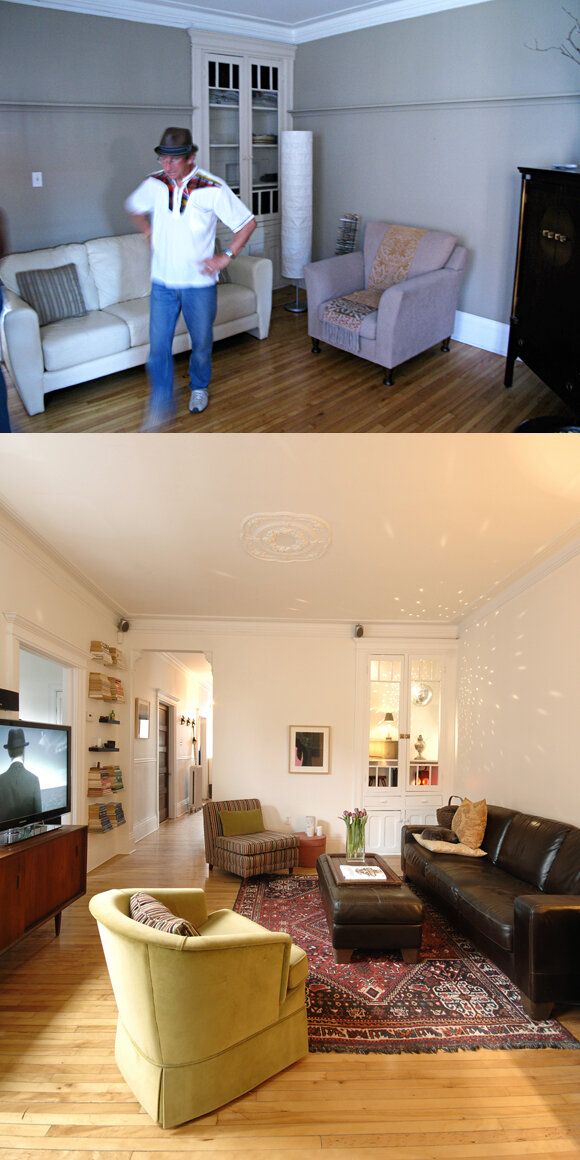
The living room was dark and beat up. We ripped out the plate rail (it wasn't original, just a poorly installed plank of wood from the hardware store), re-painted, and gutted our credenza so we could place it over an old hot-water radiator and improve the layout of the room significantly. Christian also upped the ante by setting up my old disco ball with a light source in the built-in. You can see our floating bookshelves on the left. The walls are a little bare because we were getting ready to sell our place at this point and didn't want to mess up the fresh walls too much.
The bedroom
We were so lucky to have had such a great bedroom. The brick wall, the beautiful ceiling, the double-room bonus closet space, the bay window - we didn't need to do much. We added some beautiful silk curtains my sweet and talented mother-in-law made for us, and while we were living here we finally upgraded our futon base to this monster of a bed for a screaming deal.
The spare bedroom
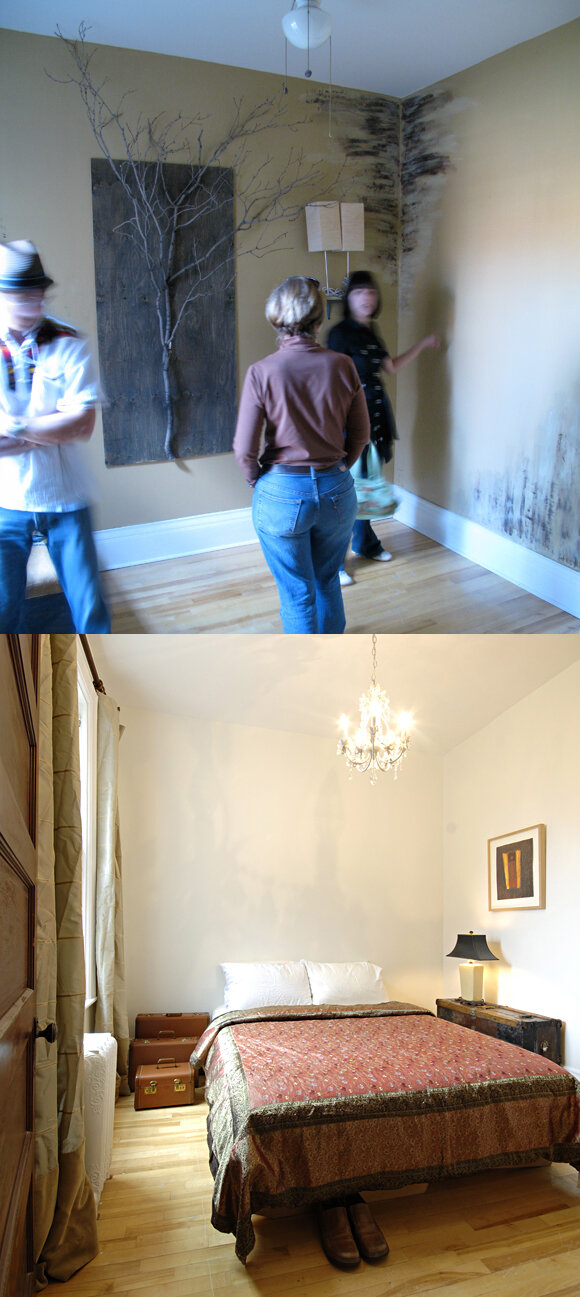
This room was another wacky one - Christian called it the monkey room because of the - well, the "smears" on the wall. Again, the "artwork" (branch) was left behind for us to dispose of (I'm a big fan of bringing the outdoors inside, but this just wasn't one of those times). Re-painting the walls was a task and a half but it felt so much better afterwards. A few curtains, a new light fixture, a bed and a few other doodads, and voilà - no more monkeys.
So, there you have it - the gist of our old apartment. We loved it and we really enjoyed fixing it up, and now, I feel like I can move on to posting about our new place with a clear mind :) I wish we had a few more photos of other rooms but by the time we were getting ready to leave, our minds were very much elsewhere. We are so grateful to our friends who came and helped us with painting, storing and moving - we couldn't have done it without them.I documented our kitchen and bathroom renos extensively, so if anybody would like a specific post about either of those rooms, feel free to let me know. Lots of stories, advice and photos. In the meantime, I put together a little list of sources below.
After photos of bathroom, dining room, and both bedrooms: Chris Kralik
Kitchen: Statuario marble counters, marble tile backsplash, Franke sink, Perrin & Rowe faucet/hardware, all from Ciot. Custom cabinetry. Cabinet pulls, marked down at Restoration Hardware. Cabinet latches, marked down at Hardware Hut. Stove and hood vent, marked down at JC Perreault. Island, IKEA. Kitchen chandelier, liquidation at Home Depot. Kitchen stools: metal frames bought at the EQ3 liquidation centre, then reupholstered. Dining room light fixture, vintage. Dining room table, 40$ at the Eco Centre. Dining chairs, on liquidation at Phillip Van Leeuwen, then reupholstered by Atlas Rembourrage. Kitchen and dining room floors, Parquet Deluxe Lasalle Inc.
Bathroom: Cheviot Iris cast iron bathtub, Perrin & Rowe faucet/hardware (bath, shower and sink), Porcher vessel sink, Porcher Archive toilet, marble mosaic tile and subway tile, all from Ciot. Vintage chandelier. Vintage vanity. Hooks, towel rack, pharmacy, vanity sconces, marked down at Restoration Hardware. Reclaimed wood shelving.
Miscellaneous: Living room credenza, second-hand from Retro Vie (in NDG). Living room tub chair, 25$ from Salvation Army then reupholstered by Atlas Rembourrage. Living room slipper chair, 10$ from garage sale then reupholstered by Atlas Rembourrage. Couch and ottoman, on sale at Mobilia. Bedroom closet chandelier, Home Depot. Bedroom closet, on liquidation in the as-is department at IKEA. Bed, on liquidation at JC Perreault.


